Amazonアフェリエイトリンク生成に必要な、ASINコードと商品名をURLから取得する
目次
はじめに
前回の記事でAmazonアフェリエイトリンクを生成してブログに貼り付けるようにしました。 コンテンツ登録が面倒なので簡単なスクリプトを書いたのでここにおいておきます。
スクリプト
Product APIを使ってやろうと思っていましたが、タイトルとASINさえ分かれば良いので Amazonのリンクから抜き出すだけで事足ります。
amazon_urls.csvというファイルにAmazon URLを並べてテキスト操作するだけのものですがこのような感じです。
import csv
import re

def extract_asin_from_url(url):
    # ASINの取得: URLの /dp/ というパスの後ろの10文字の英数字
    match = re.search(r'/dp/(\w{10})', url)
    return match.group(1) if match else None

def extract_title_from_url(url):
    # タイトルの取得: "https://www.amazon.co.jp/" の後と次の "/" までの部分
    match = re.search(r'https://www.amazon.co.jp/([^/]+)', url)
    return match.group(1) if match else None

if __name__ == "__main__":
    with open('content/amazon_urls.csv', 'r', encoding='utf-8') as f:
        csvreader = csv.reader(f)
        with open('data/amazon_products.toml', 'w', encoding='utf-8') as out_file:
            for row in csvreader:
                out_file.write("[[products]]\n")
                url = row[0]
                asin = extract_asin_from_url(url)
                title = extract_title_from_url(url)
                out_file.write(f'title = "{title}"\n')
                out_file.write(f'id = "{asin}"\n')
                out_file.write("\n")
結果
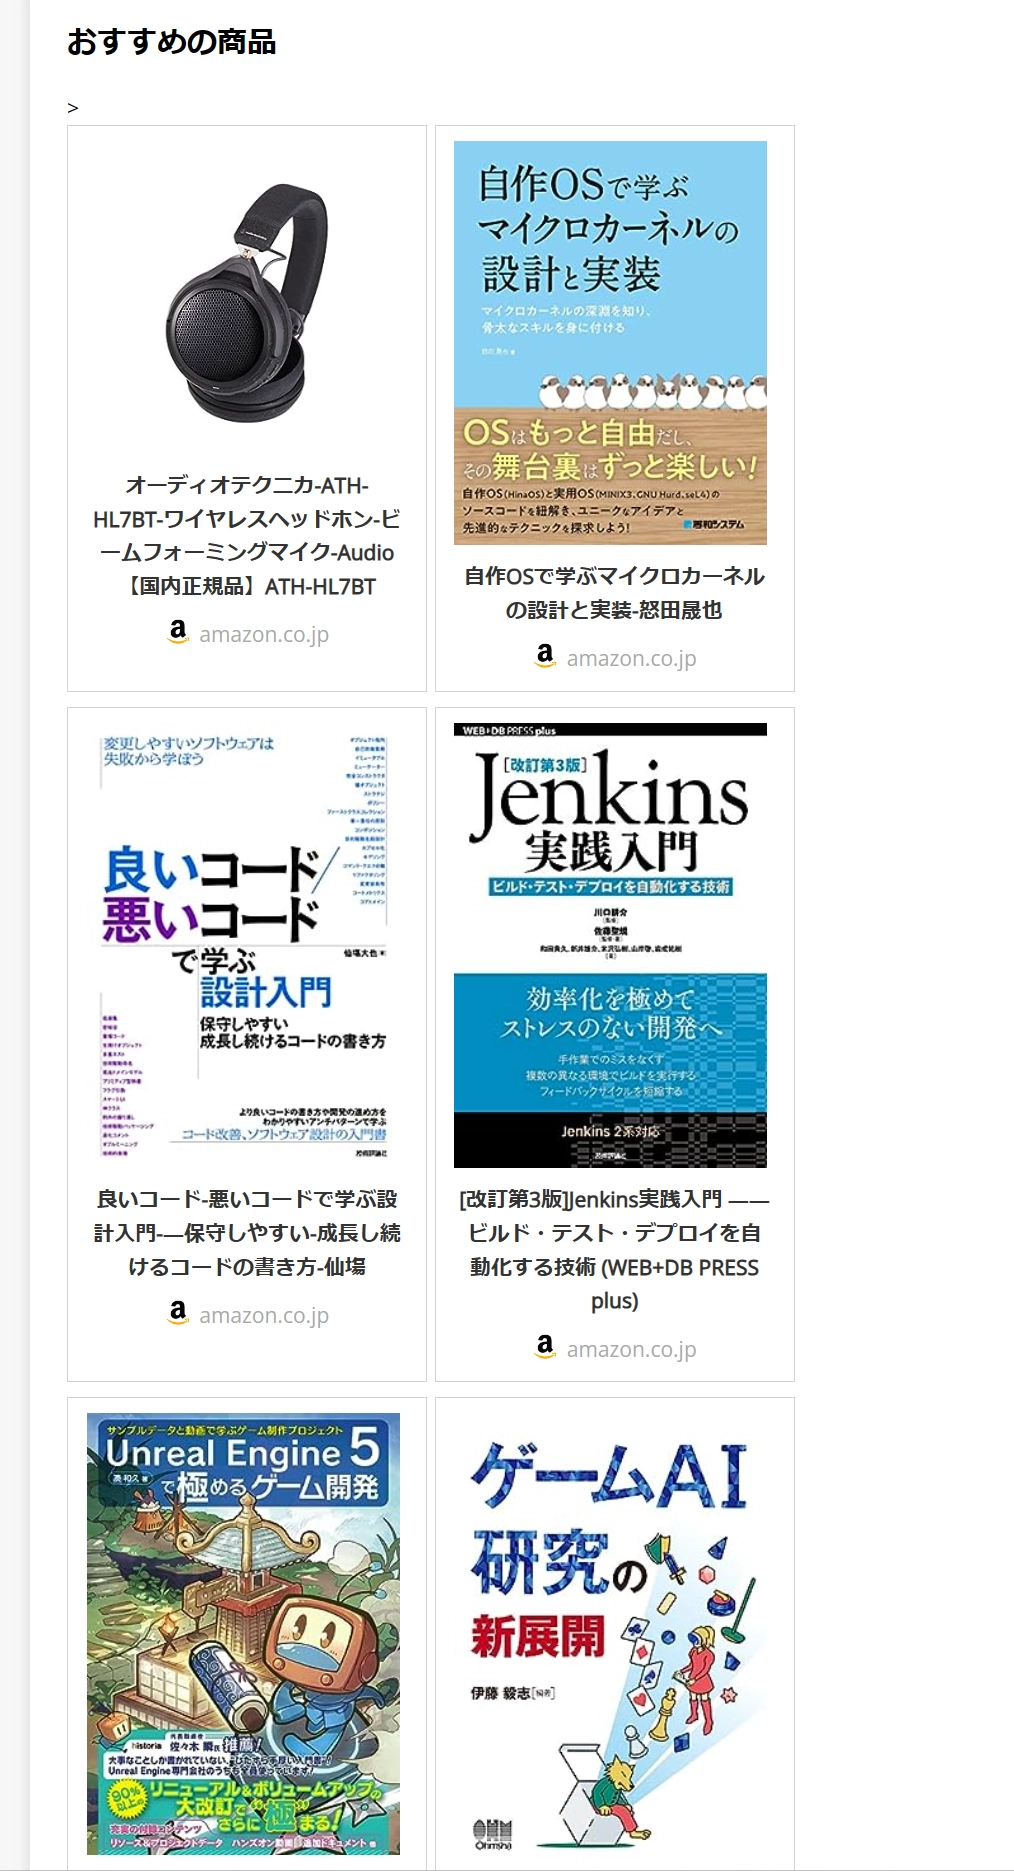
おすすめの本や実際に使っている商品が表示されるようになりました。 前回からCSSも変更しているのでそちらも公開しておきます。 よければどうぞ。
/* 複数の商品ウィジェットを囲むコンテナ */
.amazon-widgets-container {
    display: flex;
    flex-wrap: wrap;
    gap: 5px; /* 各商品ウィジェットの間隔を設定 */
}

/* 個々の商品ウィジェット */
.amazon-widget-afe {
    box-sizing: border-box; /* これが重要 */
    list-style-type: none;
    padding: 0;
    width: 240px; /* 一定の幅を設定 */
    height: auto;  /* ここで高さを固定 */
    border: 1px solid lightgray; /* 薄いグレーの枠線 */
    display: flex;
    justify-content: flex-start; /* 左揃え */
    align-items: center; /* 画像とテキストを垂直方向に中央に配置 */
    margin-bottom: 5px; /* 各ウィジェットの間のマージン */
    flex-direction: column; /* 縦方向に配置 */
}

.amazon-widget-afe a {
    box-sizing: border-box; /* これも重要 */
    display: flex;
    flex-direction: column; /* 縦方向に配置 */
    align-items: center; /* 中央に配置 */
    text-decoration: none;
    color: #333;
    width: calc(100% - 5px); /* 全幅を埋めるように */
    padding: 10px;
}

.amazon-widget-afe:hover {
    text-decoration: underline;
}

/* 商品の画像 */
.amazon-widget-img-afe img {
    width: calc(100% - 5px); /* 全幅を埋めるように */
    height: auto;  /* 画像の高さを自動に */
    object-fit: cover;
    object-position: center center;
    margin-bottom: 10px; /* 画像とタイトルの間のスペースを追加 */
}

/* 商品の情報 */
.amazon-widget-info-afe {
    display: flex;
    flex-direction: column; /* 縦方向に並べる */
    align-items: flex-start; /* 左揃え */
    flex: 1; /* 残りの幅を埋めるように */
    max-height: 240px;  /* 商品情報の最大の高さを制限 */
    padding-top: 0; /* 上部の余白を削除 */
    align-items: center; /* 中央に配置 */
}

.amazon-widget-title-afe {
    font-weight: bold;
    color: #333;
    text-align: center; /* タイトルを左揃えに */
    white-space: normal; /* タイトルが長すぎる場合に折り返す */
    overflow: hidden;
    max-width: 26ch;  /* 26文字の幅に合わせる (大体の指定) */
    text-align: center; /* タイトルを中央揃えに */
}


.amazon-widget-synopsis-afe {
    margin-top: 5px;
    text-align: left;
}

.amazon-widget-via-afe {
    margin-top: 5px;
    color: #aaa;
    display: flex;
    align-items: left;
}

.amazon-widget-via-afe img {
    width: 18px;
    height: 18px;
    margin-right: 5px;
}

まとめ
非常に簡単にですが、Amazonのアフェリエイトリンクが作成できるようになったのでここまでにします。 商品自体は手作業でポチポチ追加する必要がありますが、おすすめでも無いものが出てくる心配もないのでいいのかもしれません。 何か気に入ったものがあればぜひ購入してもらえると、ブログ運営が助かります。