Rustを始める - WSLとVisual Studio Codeでの開発環境構築
はじめに
この記事では、Rustというプログラミング言語を始めるための開発環境構築手順を説明します。また、WSLとVisual Studio Codeを使って、効率的に開発できる環境を整える方法も紹介します。
インストール
Rust - 効率的で信頼できるソフトウェアを誰もがつくれる言語
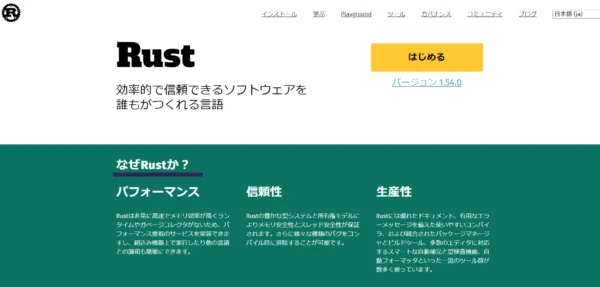
はじめるをクリックしてインストールしましょう。 インストーラDLしてダブルクリックすると完了です。
curl --proto '=https' --tlsv1.2 -sSf https://sh.rustup.rs | sh
私は、Windows Subsystem for Linuxを使っているのでこちらでインストールしました。
実行するとこういう表示がでます。
info: downloading installer

Welcome to Rust!

This will download and install the official compiler for the Rust
programming language, and its package manager, Cargo.

Rustup metadata and toolchains will be installed into the Rustup
home directory, located at:

  /home/ayahumohumo/.rustup

This can be modified with the RUSTUP_HOME environment variable.

The Cargo home directory located at:

  /home/ayahumohumo/.cargo

This can be modified with the CARGO_HOME environment variable.

The cargo, rustc, rustup and other commands will be added to
Cargo's bin directory, located at:

  /home/ayahumohumo/.cargo/bin

This path will then be added to your PATH environment variable by
modifying the profile files located at:

  /home/ayahumohumo/.profile
  /home/ayahumohumo/.bashrc
  /home/ayahumohumo/.zshenv

You can uninstall at any time with rustup self uninstall and
these changes will be reverted.

Current installation options:

   default host triple: x86_64-unknown-linux-gnu
     default toolchain: stable (default)
               profile: default
  modify PATH variable: yes

1) Proceed with installation (default)
2) Customize installation
3) Cancel installation
>
1を入力してEnterをすると、インストールが始まります。
1) Proceed with installation (default)
2) Customize installation
3) Cancel installation
>1

info: profile set to 'default'
info: default host triple is x86_64-unknown-linux-gnu
info: syncing channel updates for 'stable-x86_64-unknown-linux-gnu'
info: latest update on 2021-07-29, rust version 1.54.0 (a178d0322 2021-07-26)
info: downloading component 'cargo'
  6.0 MiB /   6.0 MiB (100 %)   2.9 MiB/s in  2s ETA:  0s
info: downloading component 'clippy'
info: downloading component 'rust-docs'
 16.7 MiB /  16.7 MiB (100 %)   2.9 MiB/s in  5s ETA:  0s
info: downloading component 'rust-std'
 21.9 MiB /  21.9 MiB (100 %)   2.9 MiB/s in  7s ETA:  0s
info: downloading component 'rustc'
 50.1 MiB /  50.1 MiB (100 %)   2.8 MiB/s in 17s ETA:  0s
info: downloading component 'rustfmt'
  3.7 MiB /   3.7 MiB (100 %)   2.8 MiB/s in  1s ETA:  0s
info: installing component 'cargo'
info: installing component 'clippy'
info: installing component 'rust-docs'
 16.7 MiB /  16.7 MiB (100 %)   8.3 MiB/s in  1s ETA:  0s
info: installing component 'rust-std'
 21.9 MiB /  21.9 MiB (100 %)  13.3 MiB/s in  1s ETA:  0s
info: installing component 'rustc'
 50.1 MiB /  50.1 MiB (100 %)  14.4 MiB/s in  3s ETA:  0s
info: installing component 'rustfmt'
info: default toolchain set to 'stable-x86_64-unknown-linux-gnu'

  stable-x86_64-unknown-linux-gnu installed - rustc 1.54.0 (a178d0322 2021-07-26)

Rust is installed now. Great!

To get started you may need to restart your current shell.
This would reload your PATH environment variable to include
Cargo's bin directory ($HOME/.cargo/bin).

To configure your current shell, run:
source $HOME/.cargo/env
正常終了したら完了です。早速始めましょう。
プロジェクトの作成
cargo new hello-rust
を実行するとプロジェクトが作られます。
フォルダの構成を確認する
擬似Treeコマンドで見てみましょう。 tree コマンドが無い環境で tree コマンドを実現
pwd;find . | sort | sed '1d;s/^\.//;s/\/\([^/]*\)$/|--\1/;s/\/[^/|]*/| /g'
フォルダ構成はこんなふうにできます。
/home/ayahumohumo/src/rust/hello-rust
|--.git
|  |--HEAD
|  |--config
|  |--description
|  |--hooks
|  |  |--applypatch-msg.sample
|  |  |--commit-msg.sample
|  |  |--fsmonitor-watchman.sample
|  |  |--post-update.sample
|  |  |--pre-applypatch.sample
|  |  |--pre-commit.sample
|  |  |--pre-merge-commit.sample
|  |  |--pre-push.sample
|  |  |--pre-rebase.sample
|  |  |--pre-receive.sample
|  |  |--prepare-commit-msg.sample
|  |  |--update.sample
|  |--info
|  |  |--exclude
|  |--objects
|  |  |--info
|  |  |--pack
|  |--refs
|  |  |--heads
|  |  |--tags
|--.gitignore
|--Cargo.toml
|--src
|  |--main.rs
好みの問題もありますが私は、apt-getできるTreeの方が好みなので、インストールします。
sudo apt-get install tree
tree .
実行結果はこうなります。
.
|-- Cargo.toml
`-- src
    `-- main.rs
いいですね。
zshを使っている場合
WSL上でbashではなくzshを使っている場合、環境変数を追加してあげる必要があります。
zsh: correct 'cargo' to '.cargo' [nyae]?
Cargoとrustupが使えないのでパスを通します。 .zshrcに追加しておけばTerminalを立ち上げるたびに動くようにできます。
echo 'export PATH="$HOME/.cargo/bin:$PATH"' >> ~/.zshrc
ターミナルを再起動すると使えるようになります。
exec $SHELL -l
パスの導通確認
rustup
実行結果を見るとパスが通っていそうですね。良いですね。
rustup 1.24.3 (ce5817a94 2021-05-31)
The Rust toolchain installer

USAGE:
    rustup [FLAGS] [+toolchain] <SUBCOMMAND>

FLAGS:
    -v, --verbose    Enable verbose output
    -q, --quiet      Disable progress output
    -h, --help       Prints help information
    -V, --version    Prints version information

ARGS:
    <+toolchain>    release channel (e.g. +stable) or custom toolchain to set override

SUBCOMMANDS:
    show           Show the active and installed toolchains or profiles
    update         Update Rust toolchains and rustup
    check          Check for updates to Rust toolchains and rustup
    default        Set the default toolchain
    toolchain      Modify or query the installed toolchains
    target         Modify a toolchain's supported targets
    component      Modify a toolchain's installed components
    override       Modify directory toolchain overrides
    run            Run a command with an environment configured for a given toolchain
    which          Display which binary will be run for a given command
    doc            Open the documentation for the current toolchain
    man            View the man page for a given command
    self           Modify the rustup installation
    set            Alter rustup settings
    completions    Generate tab-completion scripts for your shell
    help           Prints this message or the help of the given subcommand(s)

DISCUSSION:
    Rustup installs The Rust Programming Language from the official
    release channels, enabling you to easily switch between stable,
    beta, and nightly compilers and keep them updated. It makes
    cross-compiling simpler with binary builds of the standard library
    for common platforms.

    If you are new to Rust consider running `rustup doc --book` to
    learn Rust.
Visual Studio Codeを使いWSL上で開発をする方法
WSLのままだとVimやWindowsのファイルからポチポチ移動して編集するみたいなことが必要になります。
恐らく開発がやりにくいとも思いますので、Remote-WSLを使用してからWSLに繋いでやりたいと思います。
前提条件
- Windows Subsystem for Linuxを導入済み
- Visual Studio Codeを導入済み
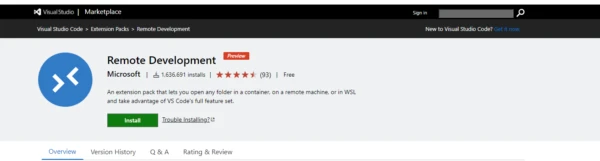
Remote Development extension packを導入する
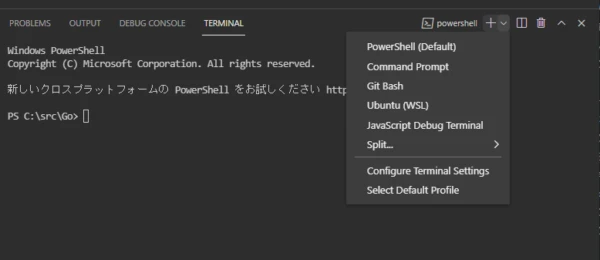
Visual Studioを立ち上げてTerminalを立ち上げます。 デフォルトだと恐らくPowershellが立ち上がりますので、Terminal をUbuntu(WSL)などお使いのLinux環境を選択します。 ※別にWindowsにインストールされているWSLのTerminalから直叩きでも良いはずですがまぁいいでしょう。
続いて、Remote WSLを使ってVisual StudioからWSL上のファイルにアクセスを行います。 やり方は、Visual Studio CodeのWSL Terminalからパスに移動して以下を実行します。
code .
これでVisual Studioが立ち上がりWSL上のフォルダが編集できます。
Rustの実行
開発環境と実行環境の設定が完了したので、早速Hello, worldを実行してみましょう。
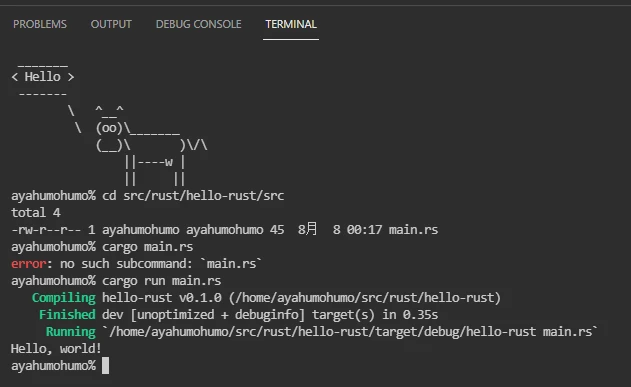
cargo run
実行結果はこんな感じです。
    Finished dev [unoptimized + debuginfo] target(s) in 0.00s
     Running `target/debug/hello-rust`
Hello, world!
buildする場合はこうなります。 buildすると実行体だけでなく、フォルダも作ってくれます。
cargo build
ビルドしたやつを実行するときはこんな感じです。 Windows環境でやる場合は .exeファイルが出来上がっていると思います。
./target/debug/hello-rust
同じ結果が得られてますね。
Hello, world!
途中 runが抜けてエラーになってますが、動かすとこんな感じです。

まとめ
この記事では、Rustの開発環境を構築し、WSLとVisual Studio Codeを使って開発する環境に慣れることができました。RustはC/C++に代わる言語として注目されており、特に組み込み系の開発で活躍することが期待されています。これからRustを使ってプロジェクトを始める際に、この記事が参考になれば幸いです。