FlutterでSnakeGameを作ろう Part2
FlutterでSnakeGameを作ろう Part2
Flutterで古典ビデオゲームの一種であるSnakeGame作成を進めていきます。 今回は、前回記事で作成した画面表示を動かしゲームとして仕上げていきます。
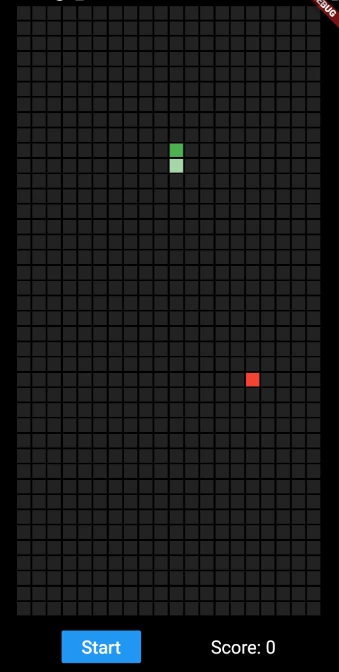
最終的に出来上がるものはこのようなゲームになります。
この記事を始める前提は、前回記事の画面を作った状態で始めます。 Flutterで作る、古典ビデオゲーム(SnakeGame)[ゲーム画面編] Part1
main.dart
class _SnakeGameState extends State<SnakeGame> {
これから記載する変数や関数は特に指定がなければこの中に追加していきます。
共通の変数定義
ヘビの進行方向と、進行方向に対応した移動先リストを作成します。 移動速度変数を用意し、餌を食べたときに速度を上げるように作ります。
const int up = 0;
const int right = 1;
const int down = 2;
const int left = 3;
const List<int> dx = [0, 1, 0, -1];
const List<int> dy = [-1, 0, 1, 0];

int second = 200;
ゲームスタート部分の作成
Part1で、Startボタンを押した際に呼ばれる関数まで作成していたのでその中身を作成します。
関数の全体像はこのように作成します。 ヘビの頭を画面の中央に設定して、身体をその一つ下のマスに追加しています。 その次に、餌を1つ作るための関数を用意します。
スタートボタンが押されていたら、定期的に呼び出されるTimer.periodic()を使い moveSnake()を呼び出し、ヘビを移動させ続けています。
  var direction = up;
  var isPlaying = false;

  void startGame() {
    snake = [
      [(squarePerRow / 2).floor(), (squarPerCol / 2).floor()]
    ];
    snake.add([snake.first[0], snake.first[1] + 1]);
    createFood();
    isPlaying = true;
    Timer.periodic(Duration(milliseconds: second), (Timer timer) {
      moveSnake();
      if (checkGameOver()) {
        timer.cancel();
        endGame();
      }
    });
  }
ヘビの移動(餌を食べたときに伸ばす処理)
setState()を呼んで状態を更新していきます。
ヘビの位置を移動方向に合わせて動かしていきます。 ヘビの頭の位置に移動先のマスを挿入してヘビの身体を伸ばします。 伸ばす先を判定するため、移動方向に対応したdx,dyのリストを使います。
餌がない場合は、伸ばした分だけ末尾を削除します。 餌があれば、伸びた身体はそのままに新しく餌を作ります。
  void moveSnake() {
    setState(() {
      snake.insert(0, [snake.first[0] + dx[direction], snake.first[1] + dy[direction]]);
      if (snake.first[0] != food[0] || snake.first[1] != food[1]) {
        snake.removeLast();
      } else {
        createFood();
      }
    });
  }
新しく餌を作る処理
餌を作る処理はシンプルです。 food配列に、乱数で作った値を格納します。
randomGenは、Part1のときに作成済みの乱数です。 nextInt()乱数を生成します。引数に与える値で作る乱数の上限を設定できます。 今回は、画面の端より外には餌を撒きたくないためセル数を指定しています。
  void createFood() {
    food = [randomGen.nextInt(squarePerRow), randomGen.nextInt(squarPerCol)];
    second = second - 10;
  }
補足ではありますが、nextIntの説明です。
dart:math

Generates a non-negative random integer uniformly distributed in the range from 0, inclusive, to [max], exclusive.

Implementation note: The default implementation supports [max] values between 1 and (1<<32) inclusive.
ゲームオーバのチェック
チェックする観点は2つだけです。
- 四方の壁にぶつかったかどうか。
- 自分の身体にぶつかったかどうか。
まず、ヘビの頭がある位置を壁の外出ないこと確認してます。 次に、自分の身体数だけ頭と身体のどこかがぶつかっていないことを確認しています。 もし、いずれかに衝突していた場合trueを返しゲームスコアを表示するようにします。
  bool checkGameOver() {
    if (!isPlaying ||
        snake.first[1] < 0 ||
        snake.first[1] >= squarPerCol ||
        snake.first[0] < 0 ||
        snake.first[0] > squarePerRow) {
      return true;
    }

    for (var i = 1; i < snake.length; ++i) {
      if (snake[i][0] == snake.first[0] && snake[i][1] == snake.first[1]) {
        return true;
      }
    }

    return false;
  }
ゲームの終了処理
ゲームを終了してスコアを画面に表示します。 結果の表示にはダイアログボックスを使用します。 ダイアログのタイトルに「Game Over」を入力し、テキスト部分にゲームのスコアを入力します。 actionsで、Closeボタンを追加しボタンが押されたらアラートダイアログを消します。
  void endGame() {
    isPlaying = false;

    showDialog(
        context: context,
        builder: (BuildContext context) {
          return AlertDialog(
            title: Text('Game Over'),
            content: Text(
              'Score: ${snake.length - 2}',
              style: TextStyle(fontSize: 20),
            ),
            actions: <Widget>[
              FlatButton(
                child: Text('Close'),
                onPressed: () {
                  Navigator.of(context).pop();
                },
              ),
            ],
          );
        });
  }
ダイアログボックスの種類
今回使用したのは、アラートダイアログと呼ばれるものです。 公式チュートリアルを見ているとダイアログは、3種類程用意されています。 Dialog class
- SimpleDialog class :オプション項目を単純に表示する
- AlertDialog class: ボタンとメッセージをセットで表示する
- showDialog function:自前でダイアログの中身を作成することができる。Tのところに自分で定義したWidgetを入れるのだと思います。(調べておきましょう)
ジェスチャーでの移動方向の切り替え実装
Part1で実装した画面にジェスチャー入力を受け付ける部分を追加します。 入力結果に応じて、ヘビの移動方向を変えるようにします。
  Widget build(BuildContext context) {
    return Scaffold(
      backgroundColor: Colors.black,
      body: Column(
        children: <Widget>[
          Expanded(
            child: GestureDetector(
+              onVerticalDragUpdate: (details) {
+                if (direction != 'up' && details.delta.dy > 0) {
+                  direction = down;
+                } else if (direction != 'down' && details.delta.dy < 0) {
+                  direction = up;
+                }
+              },
+              onHorizontalDragUpdate: (details) {
+                if (direction != 'left' && details.delta.dx > 0) {
+                  direction = right;
+                } else if (direction != 'right' && details.delta.dx < 0) {
+                  direction = left;
+                }
+              },
              child: AspectRatio(
                aspectRatio: squarePerRow / (squarPerCol + 2),
                child: GridView.builder(
                    physics: NeverScrollableScrollPhysics(),
                    gridDelegate: SliverGridDelegateWithFixedCrossAxisCount(
                      crossAxisCount: squarePerRow,
                    ),
                    itemCount: squarePerRow * squarPerCol,
                    itemBuilder: (BuildContext context, int index) {
                      return setSnakeGameBoard(index);
                    }),
              ),
            ),
          ),
          createStartButtonAndScore()
        ],
      ),
    );
  }
まとめ
Flutterで書いてみて気になるのはどうしてもネストが深くなってしまうことです。 Widgetに固めてUIなども作るためネストが深くなる想定で作られているらしいのですが… 関数に切り出したりする方法には限界がありそうです。 Flutterを触ってみて思うのは、画面も処理もなんでも書けてしまうのでごちゃ付いて行きますね。 Flutterでよく使われる手法の一つにBLoC Patternがあるようですが、勉強しないとですね。