Nuxt.jsを使ってブログを作る方法
はじめに
Nuxt.jsを使ってブログを0から作る方法を解説します。ブログの移行を進めるために、テンプレートや作り方を理解して改良していくことが目的です。この記事では、Nuxt.jsプロジェクトの作成から記事の作成、表示、編集、まとめまでの手順を説明します。
nuxt.jsプロジェクトの作成
まずは、プロジェクトを用意します。nuxt.jsの公式サイト見てやりました。
npx create-nuxt-app KokoDev
実行時に色々聞かれますがこのように実施しました。
create-nuxt-app v3.7.1
✨  Generating Nuxt.js project in KokoDev
? Project name: KokoDev
? Programming language: JavaScript
? Package manager: Yarn
? UI framework: None
? Nuxt.js modules: Content - Git-based headless CMS
? Linting tools: (Press <space> to select, <a> to toggle all, <i> to invert selection)
? Testing framework: None
? Rendering mode: Universal (SSR / SSG)
? Deployment target: Static (Static/Jamstack hosting)
? Development tools: jsconfig.json (Recommended for VS Code if you're not using typescript)
? What is your GitHub username? kenpos
? Version control system: Git
作成したプロジェクトフォルダに入って、Visual Studio Codeで開きます。 その後、プロジェクトを実行します。
cd .\KokoDev\ | code . | yarn run dev
トップページはこのような画面で表示されます。 
画像を保存するためのフォルダを作ります。
mkdir .\assets\resources
デフォルトで作られるstoreフォルダはいらんので削除します。
rm .\store\
aboutページの作成
<template>
  <div class="about">
      <h1>Test Page</h1>
  </div>

</template>

<script>
export default {

}
</script>

<style>

</style>
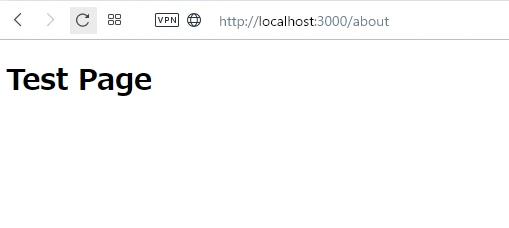
http://localhost:3000/about にアクセスすると、先程作ったaboutページが表示されます。
全ページ横断の文字を出力する
.nuxt/laouts/default.vue を編集することで実現できます。 軽く試しに編集するとこんな画面になります。
<template>
<div>
<h2>どのページにも出てくるやつ</h2>

  <Nuxt />
</div>

</template>
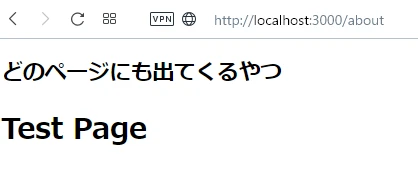
実行するとこのような表示に変わります。 
aboutページへの遷移リンクを作成する
Tutorial.vueの中身を書き換えます。
<!-- Please remove this file from your project -->
<template>
  <div class="relative flex items-top justify-center min-h-screen bg-gray-100 sm:items-center sm:pt-0">
    <link href="https://cdn.jsdelivr.net/npm/tailwindcss@2.1.2/dist/tailwind.min.css" rel="stylesheet">

      <div class="mt-8 bg-white overflow-hidden shadow sm:rounded-lg p-6">
        <nuxt-link to="about">About</nuxt-link>
      </div>
    </div>
  </div>
</template>
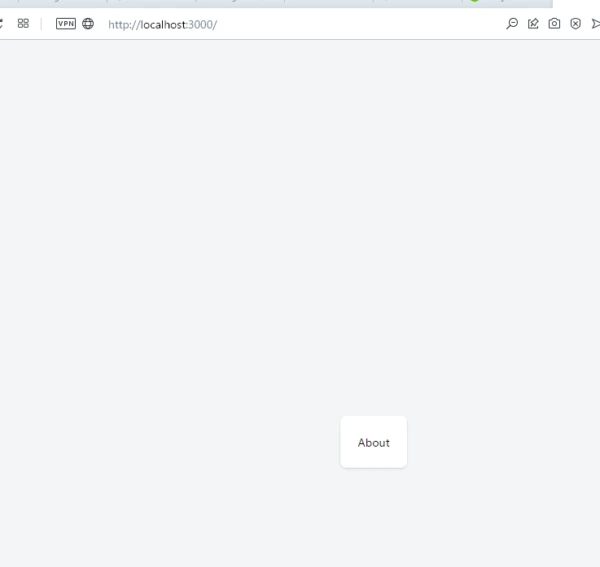
これで先程つくったページへのリンクができました。 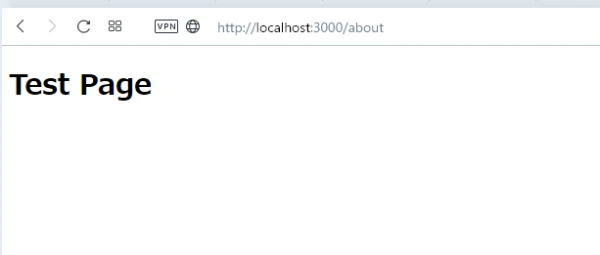
Headerの追加
linkの作り方と全ページに跨る文字の書き方がわかったので、Headerを作ります。
Header.vueの記載
pages/Header.vueを新規で作ります。
中身をこのように記述します。
<template>
  <header>
      <div class="title">心のデブを信じろ</div>
      <nav>
          <nuxt-link to="/">Home</nuxt-link>
          <nuxt-link to="/about">About</nuxt-link>
      </nav>
  </header>
</template>
navigation barの中に、nuxt-linkタグを置いて、Home画面と、Aboutページを追加するようにします。
default.vueにHeaderを追加する。
最小限の記載だとこうなります。
<template>
  <div>
    <Header/>
    <Nuxt />
  </div>
</template>
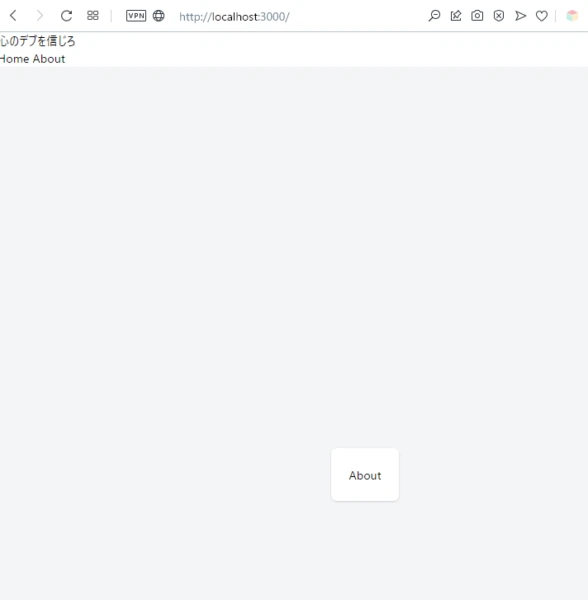
実行結果
これらの状態で実行するとこのような画面が表示されます。 この状態でリンクを踏めば書くページに遷移することができます。
いい感じのHeaderとして整える
Header styleタグを追加します。
<template>
  <header>
      <div class="title">心のデブを信じろ</div>
      <nav>
          <nuxt-link to="/">Home</nuxt-link>
          <nuxt-link to="/about">About</nuxt-link>
      </nav>
  </header>
</template>

<style>
header {
    padding: 15px 30px;
    background-color: white;
    display: flex;
    justify-content: space-between;
    align-items: center;
    box-shadow: 0px 3px 6px rgba(0, 0, 0, 0.1);
}
header .title {
    color: black;
    font-size: 24px;
    font-weight: 900;
    text-transform: uppercase;
}
nav {
    display: flex;
    align-items: center;
    margin: 0 -15px;
}
nav a {
    display: block;
    margin: 0 15px;
    color: cornflowerblue;
}
</style>
とりあえずこんな感じで追加するとHeaderが出来上がります。 今どきリッチなやつには程遠いですが続けていきます。
記事をつくっていきます。
Tutorial.vueはこのタイミングで不要になるので削除します。
contentフォルダにブログ記事を置いていきます。
articleフォルダをcontentフォルダの中に作成し、markdownファイルを作成します。 hello.mdというファイル名で記事を適当に書いてみます。 このファイル名の拡張子を覗いた部分が、リンクとして作られます。
## First-post
ためしに書いてみるがなんかでるか
_slug.vueの作成
pagesフォルダにブログ記事を関連付けるため、contentで作成した名前と同一フォルダを作ります。 content/article で作成したのであれば、pages/articleで作成します。 作成したらpages/articleフォルダの中に_slug.vueという名前でファイルを作成します。
<template>
  <article>
      <nuxt-content :document="article" />
  </article>
</template>

<script>
export default {
    async asyncData({ $content, params }) {
        const article = await $content('article', params.slug).fetch();
        return { article }
    }
}
</script>

<style>
article {
  display: block;
  margin: 0 auto;
  padding: 50px 30px;
  max-width: 800px;
}
h1 {
  font-size: 28px;
  font-weight: 900;
  margin-bottom: 30px;
}
</style>
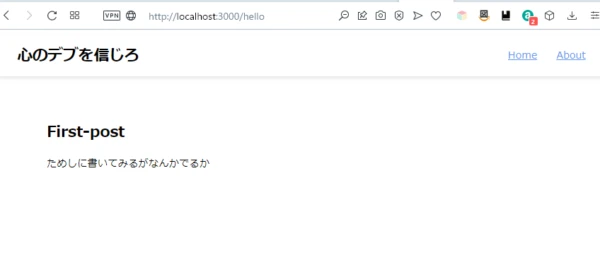
記事にアクセスしてみる
http://localhost:3000/hello 先程書いた記事の内容が書いたページに飛べることが確認できます。
markdown形式でWebブラウザ上から編集できます。
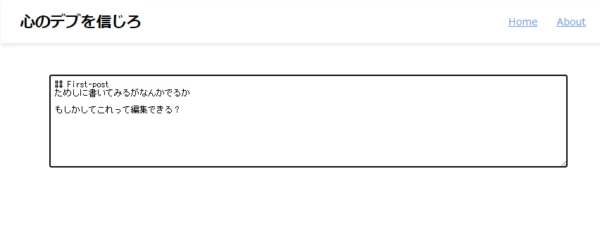
なお、編集した結果はhello.mdに追加削除されます。
Homeに記事の一覧を表示する
記事のMarkdownsの冒頭にタグを埋め込んでおきます。
# 最初の記事
かいてみましょう
こんな感じです。
index.vue
index.vueにarticleの一覧を出せるようにします。
画面表示部分には、このように記載しました。
v-forでmarkdownの記事一覧を取得しています。 nuxt-linkで記事情報を基に、ページリンクに飛べるように記載しています。
もう少し詳しく書くと、scriptタグ内の記載の戻り値のパラメータにmarkdownファイルのタイトルが含まれており、article.slugで取得してリンクに飛ばしています。
article.imgはブログ記事のタグにかかれている画像ファイル名をassets/resourcesから探してリンクを貼っています。 画像が含まれないとErrorになります。
styleはそれっぽくなるように記載してます。
<template>
  <div class="home-page">
    <h2>Articles List</h2>
        <div class="articles">
          <div class="article" v-for="article of articles" :key="article.slug">
              <nuxt-link :to="article.slug">
                  <div class="article-inner">
                        <img :src="require(`~/assets/resources/${article.img}`)" alt="" />
                        <div class="detail">
                            <h3>{{ article.title }}</h3>
                            <p>{{ article.description }}</p>
                        </div>
                  </div>
              </nuxt-link>
          </div>
      </div>
  </div>
</template>
<script>
export default {
    async asyncData({ $content, params }) {
        const articles = await $content('article', params.slug)
            .only(['title', 'description', 'img', 'slug'])
            .sortBy('createdAt', 'asc')
            .fetch();
        return {
            articles
        }
    }
}
</script>

<style>
.home-page {
  padding: 50px 30px;
}
h2 {
  margin-bottom: 30px;
  text-align: center;
}
.articles {
  margin: 0 auto;
  max-width: 800px;
}
.article {
  margin-bottom: 15px;
}
.article-inner {
  padding: 15px;
  background: #FFF;
  box-shadow: 0px 3px 6px rgba(0, 0, 0, 0.1);
  border-radius: 8px;
  display: flex;
}
.article-inner img {
  display: block;
  width: 100%;
  max-width: 300px;
}
.article-inner .detail {
  padding-left: 15px;
  padding-right: 15px;
}
h3 {
  color: #212121;
  font-size: 24px;
  text-decoration: none;
}
p {
  color: #888;
  font-size: 18px;
  text-decoration: none;
}
</style>
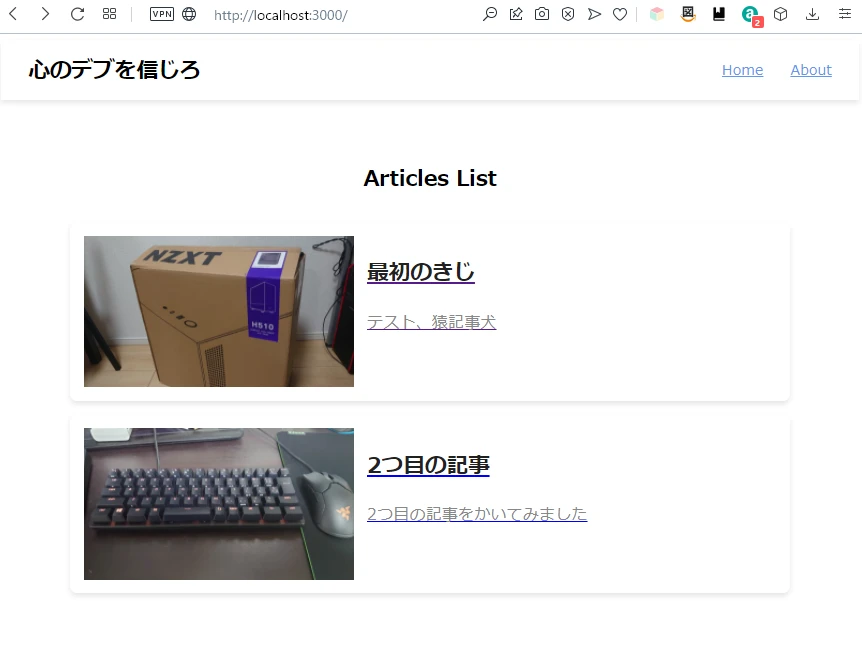
実行結果
大分ブログっぽくなりましたね。
まとめ
この記事では、Nuxt.jsを使ってブログを0から作成する方法を紹介しました。まだシンプルなデザインですが、今後、このブログをNuxt.jsで作り込み、AWSのS3バケットに移行することを目指しています。維持費が安く、更新も楽になることが期待できます。