Flutter Studioを使ってこなれたUIを作ってみよう。
Flutter Studioを使ってこなれたUIを作ってみよう
正直コードベースでUI編集したくないんだけど…と思ってるFlutterユーザのみんな!!!! コードを吐き出してくれるツールがありました!!
適当にUIを作ってみましょ。
Google Mapのようなナビゲーションアプリをイメージして作っていきます。 イメージは近くにある店を検索するようなアプリをイメージします。 ぐるなびAPIを叩いて、近くにある店までの距離を教えてくれるようなものでしょうかね。
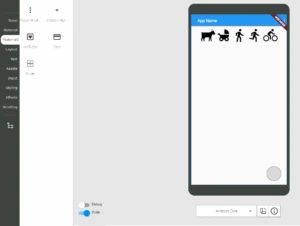
BasicタブからColumnを載せて、Row追加していきます。 追加方法はそれぞれ選択してドラッグ・アンド・ドロップでUIに載せていきます。
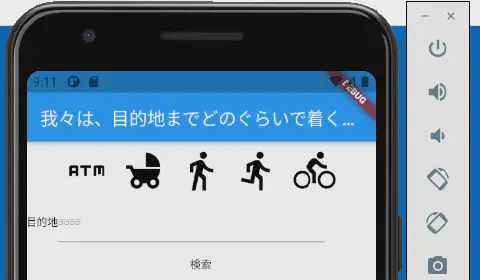
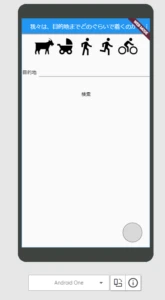
アイコンボタンを載せていきます。アイコンボタンにカーソルを当てるとアイコン自体も変更可能です。
AppBarのテキストを変えることもできます。
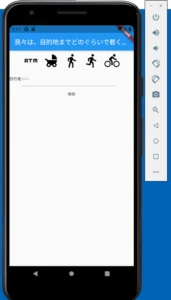
テキストや入力欄、そして検索ボタンを追加します。 これでひとまず今回作ろうと思っているUIは完成とします。
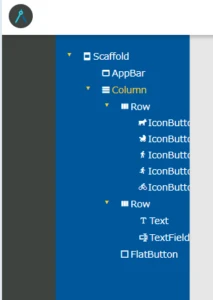
Flutter StudioではTree構造を見ることも可能です。
ソースコードの生成
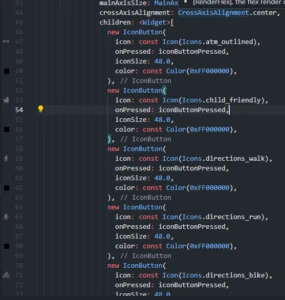
先程GUIで組み立てたアプリ画面のSource Codeはこうなります。 タブからSource Codeを開くと確認できます。
この量を手作業で書くと結構たいへんですが、GUIで作ってもらえると助かります。 このコードをベースに処理部分を書き足したり微調整するようにすれば大分負担が減るのではないでしょうか。
import 'package:flutter/material.dart';

void main() {
  runApp(new MyApp());
}
class MyApp extends StatelessWidget {

  @override
  Widget build(BuildContext context) {
    return new MaterialApp(
      title: 'Generated App',
      theme: new ThemeData(
        primarySwatch: Colors.blue,
        primaryColor: const Color(0xFF2196f3),
        accentColor: const Color(0xFF2196f3),
        canvasColor: const Color(0xFFfafafa),
      ),
      home: new MyHomePage(),
    );
  }
}

class MyHomePage extends StatefulWidget {
  MyHomePage({Key key}) : super(key: key);
  @override
  _MyHomePageState createState() => new _MyHomePageState();
}

class _MyHomePageState extends State<MyHomePage> {
    @override
    Widget build(BuildContext context) {
      return new Scaffold(
        appBar: new AppBar(
          title: new Text('我々は、目的地までどのぐらいで着くのか'),
          ),
        body:
          new Column(
            mainAxisAlignment: MainAxisAlignment.start,
            mainAxisSize: MainAxisSize.max,
            crossAxisAlignment: CrossAxisAlignment.center,
            children: <Widget>[
              new Row(
                mainAxisAlignment: MainAxisAlignment.center,
                mainAxisSize: MainAxisSize.max,
                crossAxisAlignment: CrossAxisAlignment.center,
                children: <Widget>[
                  new IconButton(
                    icon: const Icon(Icons.goat),
                    onPressed:iconButtonPressed,
                    iconSize: 48.0,
                    color: const Color(0xFF000000),
                  ),

                  new IconButton(
                    icon: const Icon(Icons.child_friendly),
                    onPressed:iconButtonPressed,
                    iconSize: 48.0,
                    color: const Color(0xFF000000),
                  ),

                  new IconButton(
                    icon: const Icon(Icons.directions_walk),
                    onPressed:iconButtonPressed,
                    iconSize: 48.0,
                    color: const Color(0xFF000000),
                  ),

                  new IconButton(
                    icon: const Icon(Icons.directions_run),
                    onPressed:iconButtonPressed,
                    iconSize: 48.0,
                    color: const Color(0xFF000000),
                  ),

                  new IconButton(
                    icon: const Icon(Icons.directions_bike),
                    onPressed:iconButtonPressed,
                    iconSize: 48.0,
                    color: const Color(0xFF000000),
                  )
                ]

              ),

              new Row(
                mainAxisAlignment: MainAxisAlignment.start,
                mainAxisSize: MainAxisSize.max,
                crossAxisAlignment: CrossAxisAlignment.center,
                children: <Widget>[
                  new Text(
                  "目的地",
                    style: new TextStyle(fontSize:12.0,
                    color: const Color(0xFF000000),
                    fontWeight: FontWeight.w200,
                    fontFamily: "Roboto"),
                  ),

                  new TextField(
                    style: new TextStyle(fontSize:12.0,
                    color: const Color(0xFF000000),
                    fontWeight: FontWeight.w200,
                    fontFamily: "Roboto"),
                  )
                ]

              ),

              new FlatButton(key:null, onPressed:buttonPressed,
                child:
                  new Text(
                  "検索",
                    style: new TextStyle(fontSize:12.0,
                    color: const Color(0xFF000000),
                    fontWeight: FontWeight.w200,
                    fontFamily: "Roboto"),
                  )
                )
            ]

          ),

      );
    }
    void buttonPressed(){}

    void iconButtonPressed(){}

}
このコードを実際に動かしてみる。
先程吐き出したソースコードを作成したプロジェクトに貼り付けます。 とりあえず貼り付け先は、dart.mainでよいですね。
Flutterを作ったプロジェクトフォルダに移動し実行します。
ここからはバグ取り作業の記録になります。
のみとり侍
※阿部寛主演の時代劇映画タイトルで特に何かあるわけでも無いでござるがここからは、拙者がプログラムに混じった蚤を取り除くで候。
アイコン無いぞ問題の解消
> flutter run
今回作成したプロジェクトではエラーが出ていました。 どうもIconが存在しないようです。
Using hardware rendering with device sdk gphone x86 arm. If you notice graphics artifacts, consider enabling software rendering with "--enable-software-rendering".
Launching lib\main.dart on sdk gphone x86 arm in debug mode...
lib/main.dart:48:44: Error: Getter not found: 'goat'.
                    icon: const Icon(Icons.goat),
Flutterの公式でサポートされているmaterial.Iconsを確認します。 Icons class
確認しているとどうもヤギのアイコンが存在しなさそうです。 変わりにATMのアイコンをはめ込んでおきましょう。
EXCEPTION CAUGHT BY RENDERING LIBRARYの対処方法
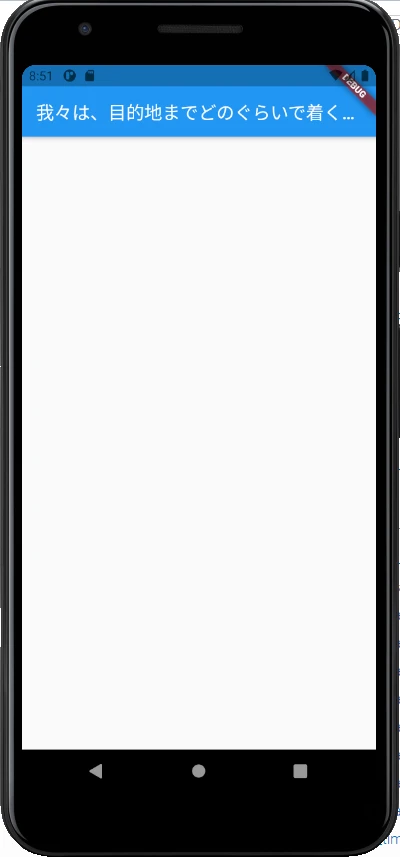
気を取り直し、再度実行します。 画面の中身が表示されておらず、少し修正が必要なようですね。(サクッと書いて終わりかと思ったんですが…)
Terminalのログを見るとこのようなものが表示されています。
Using hardware rendering with device sdk gphone x86 arm. If you notice graphics artifacts, consider enabling software rendering with "--enable-software-rendering".
Launching lib\main.dart on sdk gphone x86 arm in debug mode...
Running Gradle task 'assembleDebug'...
Running Gradle task 'assembleDebug'... Done                        19.6s
√ Built build\app\outputs\flutter-apk\app-debug.apk.
Installing build\app\outputs\flutter-apk\app.apk...                 4.0s
Activating Dart DevTools...                                      2,857ms

══╡ EXCEPTION CAUGHT BY RENDERING LIBRARY ╞═════════════════════════════════════════════════════════
The following assertion was thrown during performLayout():
An InputDecorator, which is typically created by a TextField, cannot have an unbounded width.
This happens when the parent widget does not provide a finite width constraint. For example, if the
InputDecorator is contained by a Row, then its width must be constrained. An Expanded widget or a
SizedBox can be used to constrain the width of the InputDecorator or the TextField that contains it.
'package:flutter/src/material/input_decorator.dart':
Failed assertion: line 948 pos 7: 'layoutConstraints.maxWidth < double.infinity'

Either the assertion indicates an error in the framework itself, or we should provide substantially
more information in this error message to help you determine and fix the underlying cause.
In either case, please report this assertion by filing a bug on GitHub:
  https://github.com/flutter/flutter/issues/new?template=2_bug.md

The relevant error-causing widget was:
  TextField file:///E:/SourceCode/Flutter/googlemap/lib/main.dart:90:23

When the exception was thrown, this was the stack:
#2      _RenderDecoration._layout (package:flutter/src/material/input_decorator.dart:948:7)
#3      _RenderDecoration.performLayout (package:flutter/src/material/input_decorator.dart:1294:44)
#4      RenderObject.layout (package:flutter/src/rendering/object.dart:1784:7)
#5      RenderProxyBoxMixin.performLayout (package:flutter/src/rendering/proxy_box.dart:118:14)
#6      RenderObject.layout (package:flutter/src/rendering/object.dart:1784:7)
#7      RenderProxyBoxMixin.performLayout (package:flutter/src/rendering/proxy_box.dart:118:14)
#8      RenderObject.layout (package:flutter/src/rendering/object.dart:1784:7)
#9      RenderProxyBoxMixin.performLayout (package:flutter/src/rendering/proxy
レンダリングでエラーがでているようです。 今回悪さをしているのはInputDecoratorのようです。 InputDecoratorという名前から推測するにInputできるTextBoxのサイズ幅を制限しろということだと思われます。
この修正は正直どうかとも思いますが、ConstrainedBoxでサイズを制限しておきます。
+                  ConstrainedBox(
+                      constraints: BoxConstraints(maxWidth: 300),
+                      child: TextField(
                        style: new TextStyle(
                            fontSize: 12.0,
                            color: const Color(0xFF000000),
                            fontWeight: FontWeight.w200,
                            fontFamily: "Roboto"),
+                      )),
                ]),
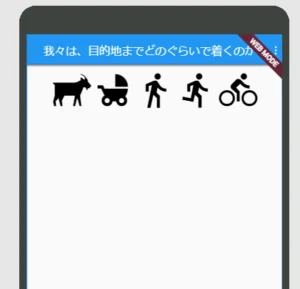
この状態で再度実行するとこのように画面が全て表示されることが確認できます。
まとめ
非公式ツールということもあり、一部未対応の機能もあるようですが… モックアップとしてはとても使い勝手の良いツールだと感じました。 うまく活用していきたいです。
余談ではありますが、FlutterのUI作成ツールについてはPhotoshopなどを作成しているAdobe社がGoogleと提携して作っているようです。


 amazon.co.jp


