FlutterでSpeed Dialボタンを実装してみよう
はじめに
映画大好きポンポさんは素晴らしいアニメ映画で、多くの人に観てもらいたいという熱い思いが伝わってきます。しかし、今回の本題は、Flutterを使ってSpeed Dialボタンを実装する方法についてです。
映画大好きポンポさん
皆さん、映画大好きポンポさん見ましたか?6/4(金)から公開しているアニメ映画なのですがね、熱量が凄いんですよ。 凄腕映画プロデューサーの少女ポンポさんに気に入られた青年が主人公です。この青年はオドオドして自分に自信が無く、映画狂いのダメ人間です。普段はぽんぽさんの助手として映画製作の現場で働いています。 ある日、映画監督から15秒スポットライトを作ってくれと頼まれ、悩みに悩んで作り上げます。そこから彼の鬱屈とした才能が花開き映画を撮ることになります。 そこからは、映像に妥協の無い青年を中心に映画製作が始まります。
銀行マンの友人が今の時代に沿った大博打のシーンが涙モノです。 映画の最期セリフもあぁなるほどなぁってなるものでした。 ここ数年で見た映画の中でぶっちぎり心に響きました。 映画のパンフレット買おうとしたんですが、売り切れてでして… マジ金だすからパンフレット買えた人、僕に譲ってくれないですか?
原作漫画1巻を大幅に加筆したストーリーなんですが、映画単体として完成仕切っているんですよ。何も事前情報無く見ても楽しいですし、原作読んでからでも最高なんですね。
もう世界中の人に見てもらいたい。ポンポさんを見てもらいたい。 そして劇場版ポンポさん2も公開してもらいたい。頼む。
本日の本題
実装するイメージは、Twitter の公式アプリケーションで使われているツイートボタンです。
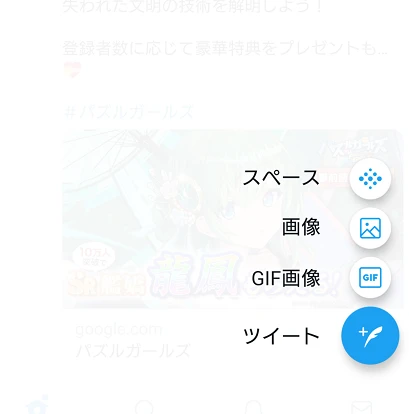
似たような機能をグルーピングしておきたいなと思った時に役立つSpeed Dialボタンの実装を考えてみましょう。
実装方法
flutter_speed_dial
Flutterマジでやりたいことが大体Pub Devにあるのでお手軽感はんぱないですよね。
flutter pub add flutter_speed_dial
ベースプロジェクト
普通にnew プロジェクトでも良いですが、githubにあげているベースプロジェクトを使っていきます。
git clone https://github.com/kenpos/providerPatternSample.git
ui.dartにSpeed dialボタンを追加する
StatelessWidgetを継承したクラスを作ります。 中身は、SpeedDialを返しています。 中身の部分は、flutter speed dialのExampleです。
下のクラスを ui.dartに追加します。追加する場所は正直どこでも良いですが、一番下に付けておきます。
class PostCode extends StatelessWidget {
  @override
  Widget build(BuildContext context) {
    return Text(
      /// context からModelの値が使える
      '${Provider.of<CountModel>(context).address}',
      style: Theme.of(context).textTheme.headline4,
    );
  }
}

+class FloatingButton extends StatelessWidget {
+  @override
+  Widget build(BuildContext context) {
+    return SpeedDial(
+      /// both default to 16
+      marginEnd: 18,
+      marginBottom: 20,
+      // animatedIcon: AnimatedIcons.menu_close,
+      // animatedIconTheme: IconThemeData(size: 22.0),
+      /// This is ignored if animatedIcon is non null
+      icon: Icons.search,
+      activeIcon: Icons.remove,
+      // iconTheme: IconThemeData(color: Colors.grey[50], +size: 30),
+
+      /// The label of the main button.
+      // label: Text("Open Speed Dial"),
+      /// The active label of the main button, Defaults to +label if not specified.
+      // activeLabel: Text("Close Speed Dial"),
+      /// Transition Builder between label and activeLabel, +defaults to FadeTransition.
+      // labelTransitionBuilder: (widget, animation) => +ScaleTransition(scale: animation,child: widget),
+      /// The below button size defaults to 56 itself, its +the FAB size + It also affects relative padding and +other elements
+      buttonSize: 56.0,
+      visible: true,
+
+      /// If true user is forced to close dial manually
+      /// by tapping main button and overlay is not rendered.
+      closeManually: false,
+      curve: Curves.bounceIn,
+      overlayColor: Colors.black,
+      overlayOpacity: 0.5,
+      onOpen: () => print('OPENING DIAL'),
+      onClose: () => print('DIAL CLOSED'),
+      tooltip: 'Speed Dial',
+      heroTag: 'speed-dial-hero-tag',
+      backgroundColor: Colors.white,
+      foregroundColor: Colors.black,
+      elevation: 8.0,
+      shape: CircleBorder(),
+
+      // orientation: SpeedDialOrientation.Up,
+      // childMarginBottom: 2,
+      // childMarginTop: 2,
+      gradientBoxShape: BoxShape.circle,
+      gradient: LinearGradient(
+        begin: Alignment.topCenter,
+        end: Alignment.bottomCenter,
+        colors: [Colors.lightBlue, Colors.lightBlue],
+      ),
+      children: [
+        SpeedDialChild(
+          child: Icon(Icons.accessibility),
+          backgroundColor: Colors.white,
+          label: 'First',
+          labelStyle: TextStyle(fontSize: 18.0),
+          onTap: () => print('FIRST CHILD'),
+          onLongPress: () => print('FIRST CHILD LONG PRESS'),
+        ),
+        SpeedDialChild(
+          child: Icon(Icons.brush),
+          backgroundColor: Colors.white,
+          label: 'Second',
+          labelStyle: TextStyle(fontSize: 18.0),
+          onTap: () => print('SECOND CHILD'),
+          onLongPress: () => print('SECOND CHILD LONG +PRESS'),
+        ),
+        SpeedDialChild(
+          child: Icon(Icons.keyboard_voice),
+          backgroundColor: Colors.white,
+          label: 'Third',
+          labelStyle: TextStyle(fontSize: 18.0),
+          onTap: () => print('THIRD CHILD'),
+          onLongPress: () => print('THIRD CHILD LONG PRESS'),
+        ),
+      ],
+    );
+  }
+}
SpeedDialの呼び出し
FloatingActionButtonとして、先程追加したクラスを指定します。
class AppBody extends StatelessWidget {
  @override
  Widget build(BuildContext context) {
    return Consumer<CountModel>(
        builder: (context, model, child) => Scaffold(
            appBar: AppBar(
              title: Text('Flutter Demo Home Page'),
            ),
            floatingActionButton: FloatingButton(),
            body: Center(
              child: Column(
                mainAxisAlignment: MainAxisAlignment.center,
                children: <Widget>[
                  PostCode(),
                  CountText(),
                ],
              ),
            )));
  }
}
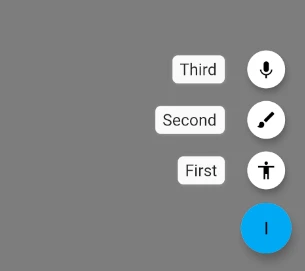
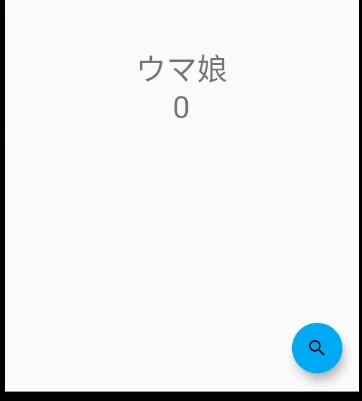
実行結果
FloatingActionButtonが右下に追加されます。 このボタンをクリックすると、メニューバーが開きます。
まとめ
この記事では、FlutterでSpeed Dialボタンを実装する方法を紹介しました。これにより、アプリケーションのUIをより使いやすくすることができます。
そんな記事の内容よりもポンポさんですよ。 みんな本当に映画館でポンポさん見て。 最高だからポンポさんみて。