モダン言語Rustを勉強してみよう(基本構文)

はじめに
P5のアニメを見始めました。毎度ペルソナのアニメは出来がいい。めっちゃ面白いですね。
特にそれ以上言うこともないので今日の記事を書きましょう。 この間、環境だけ作って置いていたRustを始めて見ようと思いまして、基本機能をなぞっていこうかと思います。
Hello world
挨拶していきましょう。
fn main() {
    println!("Hello, world!");
}
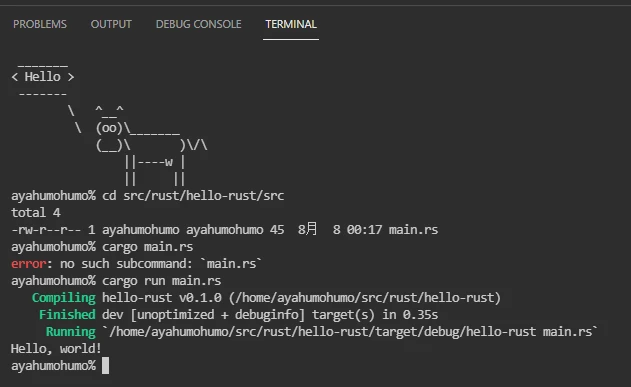
Sampleで作られているのでこれをそのまま実行します。
cargo run
実行結果
実行するとハロワが出ます。
cargo run
   Compiling hello-learn v0.1.0 (E:\SourceCode\Rust\hello-learn)
    Finished dev [unoptimized + debuginfo] target(s) in 0.58s
     Running `target\debug\hello-learn.exe`
Hello, world!
変数定義
Rustでは、変数定義が標準だとC++でいうconst定義だと聞いたことがあります。 変数のスコープが長くなると、変数内に何が入っているのか把握しきれなくなりそれが不具合の原因になります。 これはよく聞く話です。
Rustでは、標準的に再代入ができなくなるようにしておくことで、そういった不具合を防ぐことができます。
fn main() {
    println!("Hello, world!");

    let x = 10;
    println!("{}",x);

    x = 20;
    println!("{}",x);
}
変数に代入したことを怒られます。
error[E0384]: cannot assign twice to immutable variable `x`
 --> src\main.rs:7:5
  |
4 |     let x = 10;
  |         -
  |         |
  |         first assignment to `x`
  |         help: consider making this binding mutable: `mut x`
...
7 |     x = 20;
  |     ^^^^^^ cannot assign twice to immutable variable

error: aborting due to previous error

For more information about this error, try `rustc --explain E0384`.
error: could not compile `hello-learn`

To learn more, run the command again with --verbose.
エラーになるため、変数を再定義するかmutをつけることで変数の値を書き換えることができる。
fn main() {
    println!("Hello, world!");

    let x = 10;
    println!("{}",x);

    let x = 20;
    println!("{}",x);

    let mut x = 30;
    println!("{}",x);

    x = 40;
    println!("{}",x);

}
実行結果
実行するとエラーなく値書き換えができる。
Compiling hello-learn v0.1.0 (E:\SourceCode\Rust\hello-learn)
 Finished dev [unoptimized + debuginfo] target(s) in 1.40s
  Running `target\debug\hello-learn.exe`
Hello, world!
10
20
30
40
数値型
変数のサイズは8,16,32,64,128 bitが用意されている。 i:符号あり整数型 u:符号なし整数型 f:浮動小数点型
i32とか、i128とか定義することができる。 構造体の中で実際に使ってみるか。
関連関数 impl
構造体ごとに関数を定義することができます。珍しい機能ですね。 構造体名::関連関数とすることで実行できる。
struct Point {
    x: f64,
    y: f64,
}

impl Point {
    fn create(x: f64, y: f64) -> Self { // Self は実装している型の型エイリアス
        Self { x, y }
    }
}

fn main() {
    let a = Point::create(30., 90.);

    print!("x={}, y={}", a.x, a.y);
}
実行結果
cargo run
  Compiling hello-learn v0.1.0 (E:\SourceCode\Rust\hello-learn)
   Finished dev [unoptimized + debuginfo] target(s) in 0.49s
    Running `target\debug\hello-learn.exe`
x=30, y=90
Adapter(アダプター)
Filterやmapなどの操作を呼び出すことになる。
fn main() {
    let objective: Option<i32> = Some(1);
    match objective{
        Some(x) if x % 2 == 0 => println!("偶数:{}",x),
        Some(x) => println!("奇数:{}",x),
        None => println!("値なし"),
    }

}
実行結果
こうなる。
Compiling hello-learn v0.1.0 (E:\SourceCode\Rust\hello-learn)
    Finished dev [unoptimized + debuginfo] target(s) in 0.77s
     Running `target\debug\hello-learn.exe`
奇数:1
Vector型
C++に付いているようなVector型もRustには実装されています。 Rustはいろんな言語のいいとこ取りした言語ということもあってやりたいことがあれば大体実装されてるみたいです。 いいね。
fn main() {
    let mut vec = Vec::new();
    vec.push(1);
    vec.push(2);

    for x in &vec {
        println!("{}", x);
    }
}
実行結果
Compiling hello-learn v0.1.0 (E:\SourceCode\Rust\hello-learn)
 Finished dev [unoptimized + debuginfo] target(s) in 0.68s
  Running `target\debug\hello-learn.exe`
1
2
Vector構造体
同じように、vec![]というマクロも用意されている。 ついでにfor文で読み出してみますか。
fn main() {
    let v = vec![0,1,2,3,4];
    for elem in &v {
        println!("{}",elem);
    }
}
実行結果
こんな風に書くことができる。
   Compiling hello-learn v0.1.0 (E:\SourceCode\Rust\hello-learn)
    Finished dev [unoptimized + debuginfo] target(s) in 0.78s
     Running `target\debug\hello-learn.exe`
0
1
2
3
4
制御構文
if文を使うとこうなります。 書き方はC++と大体同じですね。
fn main() {
    let v = vec![0,1,2,3,4];
    for elem in v {
        print!("{}:",elem);

        if elem >= 3 {
            println!("条件を満たした")
        }else{
            println!("条件を満たしてない")
        }
    }
}
実行結果
実行結果はこんな感じになります。
Compiling hello-learn v0.1.0 (E:\SourceCode\Rust\hello-learn)
 Finished dev [unoptimized + debuginfo] target(s) in 0.89s
  Running `target\debug\hello-learn.exe`
0:条件を満たしてない
1:条件を満たしてない
2:条件を満たしてない
3:条件を満たした
4:条件を満たした
struct型
他の言語のやつと同じです。
struct Address {
    email: String,
}

fn main() {

    let user1 = Address {
        email: String::from("someone@example.com"),
    };

    println!("{}", user1.email);
  }
実行結果
構造体にある値を表示するのも他の言語と大体同じです。
cargo run
  Compiling hello-learn v0.1.0 (E:\SourceCode\Rust\hello-learn)
   Finished dev [unoptimized + debuginfo] target(s) in 0.80s
    Running `target\debug\hello-learn.exe`
someone@example.com
配列
他の言語にあるような配列と同じです。 配列の定義時に型と個数も指定して書くようです。
pythonで書くような部分的な取り出しも出来ます。
fn main() {
    let a:[i32;4] = [0,1,2,3];

    println!("a={:?}", &a);
    println!("a={:?}", &a[1..3]);
}
実行結果
実行したらこんな感じです。
cargo run
   Compiling hello-learn v0.1.0 (E:\SourceCode\Rust\hello-learn)
    Finished dev [unoptimized + debuginfo] target(s) in 0.70s
     Running `target\debug\hello-learn.exe`
a=[0, 1, 2, 3]
a=[1, 2]
まとめ
これでとりあえず主要な機能の一部を抑えたかしら。 もう少し触ってみて判断しましょう。


